Showing posts with label Monday Made It. Show all posts

Monday, August 4, 2014

Monday Made It: Craftivities and Freebies!

It's Monday Made It time already?  How can that possibly be?

Thanks again to Tara at 4th Grade Frolics for hosting this linky party!  It's such motivation to get things done!  I catch myself trying to beat the clock to finish projects before midnight on Monday night.  :

If you haven't been there yet, her linky party is FULL of great ideas!!

This week, I had extra motivation to complete a few projects.  In addition to the Monday linky party, TPT is throwing a sale!  Everything in my store is marked down and if you use the code BTS14 you get an extra discount at checkout.  Lots of sellers are participating.  Go check your wishlist as well as all the new posts that went up this week!


I also had a deadline from my school to turn in a stack of postcards to send to my new 5th graders.  Just your luck, I put these in my TPT store for FREE!  They say 5th grade on them, but if you want a different saying, add it in the comments below.  I may be able to add a few other versions for my blog readers. :)  Yes, I REALLY want some blog comments!


I made 30 of these and delivered them to my school to be stamped and sent out this week!


The other project I finished today has been MONTHS in the making.  I have been working on this for a loooonnnnnggggggg time!  I even got my niece (6) and nephew (3) involved in helping me test them out. Check it out:

 Incentive chart Craftivities!!  No more boring incentive charts! These will have your students or children eager to show off their efforts!


1. Start with a background page. 

2. Choose what activities your students or children need to do in order earn a piece of the picture. (Read for 20 minutes, turn in their homework, do their chores, etc) 

3. When they complete the activity, they get to attach a piece to the picture. 


Pictures have no limit to the number of pieces you can attach! Put sprinkles on cupcakes, feathers on a turkey, or flowers in a vase. 


15 different incentive charts included! 
Color and blackline versions -- kids can color their own! 
All pieces included -- just print, cut, and glue!
Get extra crafty and use items like sequins, stickers, or feathers!


My niece (6) and nephew (3) had a great time making some of these craft projects with Auntie Heather!  Check out their versions!  (And the kids both wanted me to print them more!  My sister is getting a copy of the whole document so she can print as many as they want.)


I want to put one of the charts on TPT as a free sample.  Do you have a favorite?
Vote in the comments below.  The one with the most votes by next Monday will become a freebie!  :)

Vote for your favorite:  
Tree with leaves
Monster with eyeballs
Turkey with feathers
Pine tree with ornaments/lights
Snowy village with snowflakes
Cupcake with sprinkles
Cloud with rainbow stripes
Umbrella with raindrops
Vase with flowers
Picnic with ants
Dog with bones
Box with popcorn
Gumball machine with gum
Watermelon with seeds
Fishbowl with pebbles

Thanks for stopping by!

Monday, July 28, 2014

Monday Made It: Library Labels and a BONUS!!

Joining up again with 4th Grade Frolics for a "Monday Made It."


I've been busy this week getting ready for some visitors to my house.  My sister and her family are FINALLY coming to see me!!!  They haven't ever been to this house or Michigan, so I'm thrilled.  But of course that means I also have to have the whole house tidy enough to let her look in every room.  Uh oh!!

Anyway, I've been slogging through my classroom library collection this week, trying to finish labeling each book with the three levels I want to include.  I thought I'd show you how simple it is to make these.

I can't decide if I use this tool more for my crafting or my classroom.  I LOVE my Xyron machine.  It takes paper and turns it into stickers.  Or in my case, labels.  It's so simple to use!

Just stick the paper in on one side and turn the crank. 


Once it's past the edge on the other side, slide the little blade to cut it off. 


Peel the top plastic sheet away. 
(it takes away the extra adhesive from around the edges of your items) 


Easy peasy, ready to use! 

Once my books have stickers, I look up all their levels and write them on the label by hand.  


I've only got about 20 more stacks like this one left to go!  (This is a really long, tedious project!)


In case you're wondering, I just make my labels in MS Word using a table with no borders. Print, cut, roll through the Xyron, and label!

Now for my bonus feature!  :)

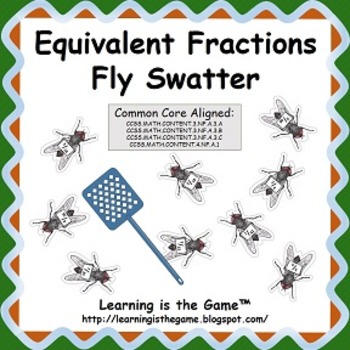
My friend, Dave, from Learning is the Game made this AWESOME activity for me!


It's easy set up -- print, cut, and add velcro to fly swatters.

The kids slap a fly, state the simplified fraction (in the example above, 2/18 would be 1/9) and then flip it over to check.  If they're right, they keep the fly for a point.  


Check out Dave's blog post or his TPT store for more details.

Hope you're having a great Monday!

Monday, July 21, 2014

Monday Made It: Mini Chart Stand with PVC pipes

A little late in the evening to get this post up, but better late than never, right? :)

Thanks 4th Grade Frolics for the chance to show off my new PVC skills!


So, I saw this on Pinterest and thought it would be perfect for independent stations and anchor charts this year. I thought I'd follow the link and see how hard it would be to make one.  I'm crafty, but not handy.  My husband isn't handy either.  Neither of us has ever worked with PVC before.  I was thinking "I'll never be able to do this...  I bet I don't have the tools and that they cost a lot... I'll probably glue a pipe to my forehead or something..."  

Thanks to Falling Into First for sharing this great idea!  She's got great directions on her site for how to make this.  Of course, once I saw the low cost, easy-to-make chart stand, I started wondering about what other PVC items I could make for my classroom.  Is it going to be worth it to get a lot of PVC or am I just going to make a couple chart stands?

I dare you to type "PVC classroom" into the search engine of Pinterest.  I found some GREAT ideas.  Ok -- I'm willing to take the plunge.  I decided to start with the chart stand and see if it's as easy as they say it is...

Voila! My chart stand!
                                             
After viewing several projects, I saw this tool on someone's directions.  They said it would only cost about $10.  I got mine at Home Depot for $11.98.

(And am I the only one who looks at that picture and sees a bird?)

The tool makes cutting the PVC pipes so easy!  It's just like a scissors with a ratchet feature, so there wasn't much pressure needed to make it cut.  It really is that easy, folks!

Here's the basic process I went through:


Measure carefully
cut with this PVC tool


put the pieces together
Add decorative tape (lengthwise was easiest)


And it's done!


And interchangeable for landscape charts with just one more short pipe covered with tape:


Total cost:
Tool = $11.98
Pipe = $1.38
(and I have enough left to make another)
elbow connectors = $0.50 for two
"adapters" = $0.74 for two
corner "side outlet elbows" = $3.72 for 2

So, now that I own the tool, it will cost me $6.34 for any more chart stands that I make.  (Or less because I'll have leftover pipe.)

I'm not sure it's sturdy enough for me.  I might try a few other methods of making a more stable base.  I'll let you know if I find something better!  It actually took me longer to apply the tape than make the stand.  It's taking me longer to write this post than the entire process of building the project.

Anybody have any good PVC projects they've made?  Any great pins you've found?  Any suggestions for a better base?  I'd love to hear your comments in the space below!