Showing posts with label organization. Show all posts

Monday, July 28, 2014

Monday Made It: Library Labels and a BONUS!!

Joining up again with 4th Grade Frolics for a "Monday Made It."


I've been busy this week getting ready for some visitors to my house.  My sister and her family are FINALLY coming to see me!!!  They haven't ever been to this house or Michigan, so I'm thrilled.  But of course that means I also have to have the whole house tidy enough to let her look in every room.  Uh oh!!

Anyway, I've been slogging through my classroom library collection this week, trying to finish labeling each book with the three levels I want to include.  I thought I'd show you how simple it is to make these.

I can't decide if I use this tool more for my crafting or my classroom.  I LOVE my Xyron machine.  It takes paper and turns it into stickers.  Or in my case, labels.  It's so simple to use!

Just stick the paper in on one side and turn the crank. 


Once it's past the edge on the other side, slide the little blade to cut it off. 


Peel the top plastic sheet away. 
(it takes away the extra adhesive from around the edges of your items) 


Easy peasy, ready to use! 

Once my books have stickers, I look up all their levels and write them on the label by hand.  


I've only got about 20 more stacks like this one left to go!  (This is a really long, tedious project!)


In case you're wondering, I just make my labels in MS Word using a table with no borders. Print, cut, roll through the Xyron, and label!

Now for my bonus feature!  :)

My friend, Dave, from Learning is the Game made this AWESOME activity for me!
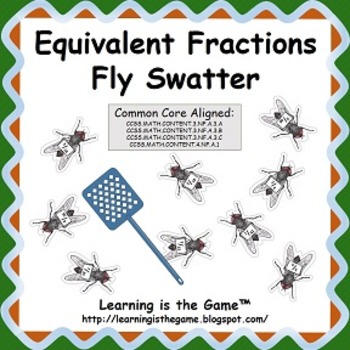

It's easy set up -- print, cut, and add velcro to fly swatters.

The kids slap a fly, state the simplified fraction (in the example above, 2/18 would be 1/9) and then flip it over to check.  If they're right, they keep the fly for a point.  


Check out Dave's blog post or his TPT store for more details.

Hope you're having a great Monday!

Thursday, October 10, 2013

Classroom Library Organization? There's an app for that...

One of the things I needed to do this year was update my classroom library to include Lexile levels.  The school I where I'm teaching uses a reading test three times each year which gives us each student's Lexile range.  I'm used to the Guided Reading levels.  No matter what you may find about how those two systems work, they don't actually align well.  They use totally different features to determine reading level.

So anyway, I needed to make labels for my books that had Lexile levels included.  (I also included Guided Reading and Accelerated Reader if I could find them.)  I'm so glad I found two AMAZING resources to find these levels.

First, I used "Classroom Organizer."  Check it out here:  http://classroom.booksource.com/ 

I was able to quickly scan the barcode on the back of each book with the smartphone app.  The site then provided me with an Excel spreadsheet of every piece of information they had about the book (title, author, levels, genre, list price, etc.).  Some books had tons of information.  Other books had very little information.  Since it was all in a spreadsheet, though, I could easily sort the books and use other resources to find the missing pieces.

Scholastic has their "Book Wizard."  This is the resource I went to when I needed more information.  Check it out here:  http://www.scholastic.com/bookwizard/ 

Next, I took the spreadsheet and created a "mail merge" document in MS Word.  I used the address labels feature and placed Title, Lexile level, GR level, AR level and AR points all on a small label and printed them.

Now, you can purchase labels and try to get everything to line up just right, or you can print on paper and then run it through a sticker machine.  What?  You don't have one?  You've got to check out the Xyron machines.  I use them for everything!!

Product SmallImageXyron


http://www.xyron.com/enUS/Categories/Creative_Station/9__Creative_Station.html

You can find these in many of the big box craft stores, online, or sometimes at your local scrapbooking stores.  They will do not only sticker-making, but also laminate and make magnets.  If it's flat, it can become a sticker!   No electricity needed -- you crank the handle by hand and out slides  your project.  The machines come in many sizes.  This 9 inch version is my favorite machine at home, but I also have the 5 inch version in my classroom and the 1.5 inch version at home.

So, with just a few minutes of scanning with a phone, an hour of searching for missing book levels, a few minutes to mail merge a document and print,  and seconds to crank them into stickers, I have labels ready for several hundred books.  Now, if I could just remember to bring them to school, I could start attaching them to my library.  :)

Hope this Helps!
Heather Q


Tuesday, August 20, 2013

Attendance and Lunch Count Board

Here's a picture of that board I got earlier this summer.  I've got magnet clips with cute little smiley faces :) on them.  Each student will get a number at the beginning of the year.  In the mornings when they arrive, they'll take a card for the type of lunch they are having (blue = lunch from home, orange = school hot lunch, green = school salad) and hang it with their clip.  I can easily see who has arrived and their lunch choice so I can quickly enter it into the computer system right away.  One student will have the daily class job of removing the cards once attendance/lunch count are entered. 

Do you do something like this?  Do you use magnet boards in other ways?  I'd love to hear about it!  Comment here.  Share your blog address.  I'll come visit! 
HQ

Wednesday, August 7, 2013

Back to School "Before" Pictures

I did it.  I went into my classroom to actually DO something in there.  I've stopped by a few times this summer for other reasons and poked my head inside to grab a manual or measure the window for curtains.  Today, though, I actually spent time in my room. 

It's been several years since I've had my own classroom.  I've been an ESL teacher with an office for the past few years, teaching my lessons at a table in a little hallway nook. Before that, I was a substitute teacher/grad student since I was new to the area and jobs were scarce.  Before that, I was a "Long Term Leave Replacement" teacher in a few different settings while my husband worked on a temporary grant at a major university in New Jersey.  I haven't actually had my own classroom (where I wasn't a temporary 1 year leave replacement in someone else's room) since the spring of 2004.  OMG!  That's a loonnnngggg time!

While I've had lots of experience keeping myself portable and using another teacher's space/materials/organizational systems, it's been years since I've had to organize myself for myself in my own space.  Know what I mean? 

So, today I went in.  It was a daunting task.  At least the previous teacher left it very empty for me.  And the custodial staff did an awesome job of cleaning it all for me.  But I had to just stand there and look at the space for a little bit.  I needed to see its potential.  Since I've been an ESL teacher at this school for a few years, I knew what the previous teacher in that space had done with the desks, the tables, the bookshelves.  I needed to figure out what's going to work for me. So I stood there.  And stood there.  Then I took a few pictures and stood there some more.

It's very clean, isn't it?  
Everything had been shoved to the front so the custodial staff could clean the carpeting.


 Well, bookshelves on the table make the floors easy to clean.
Plus, they're empty, so there are lots of opportunities for how to use them at this point.


And then I opened the...


 CLOSET of DOOM!!!
dun dun dun...

I had known it was there.  I was trying to forget about it all summer long.  Everything this teacher left behind is shoved in here.  There's no real organization.  The shelves are drooping.  The heaviest stuff is on the top.  The bottom has a lot of space only because our old curriculum had been boxed up for disposal and one of our administrators just came in this week and got it.  Otherwise, that part had been full the last time I looked at it.

Well, I couldn't do it today, either. I closed the closet doors and pretended it didn't exist.  Perhaps I'll look at it tomorrow. :)  Instead, I spent several hours arranging furniture, testing different options before I start filling up the bookshelves and desks.  I was sweaty and exhausted, but I think I know how it's going to be set up. 

 I still don't have all the furniture where I want it.  I just couldn't move a couple of things by themselves.  My husband has offered to help on Friday morning, so I'll save it for him then.  I didn't take any pictures yet because I'm not totally sure there's been an improvement yet.  

But don't worry!  I'm going back in tomorrow and the next day and will be working on some great projects over the weekend to turn this boring, plain, empty room into one that is vibrant, exciting, and fabulous.  Just wait - you'll see!  (Hey -- maybe you should follow me so you actually remember to come back and check?  Just a suggestion!)


Wednesday, June 26, 2013

Prettier than cardboard

I need to get ready for my new classroom in the fall, but it's not ready yet.  They're still cleaning it and I can't get in to do much.  So I've got a lot of projects I'm working on and a TON of stuff in my basement.  I decided to get some of those cardboard file boxes from my local office supply store.  I had planned to get the cheapest ones possible because they'd be temporary.   But, when I got there, I saw THESE:

DiVOGA File Storage Box


 They were only a little more expensive than the basic cheap ones, so I splurged.  I plan to decorate my classroom in black and white with a splash of blue, so I thought these would be PERFECT!!

I excitedly began to fold the 6 boxes and lids into shape.  Then I looked at my hands.  The black was rubbing off on my fingers!  EWWWW! 

I decided to get creative and cover the lids with contact paper.  Here's my step by step tutorial for you on how to cover a box lid with contact paper smoothly.

1st:  Measure and cut the contact paper a few inches bigger than the box lid (enough that you can cover the sides and roll the excess to the inside of the lid.


2nd: Peel the backing off of MOST but NOT ALL of the contact paper -- you'll need somewhere to hold it where it won't stick to you.


3rd:  Line up the side of the lid with enough excess that you'll be able to roll it over to the interior.


 4th:  Lay the lid flat on the table carefully so that the contact paper has no/few wrinkles.


5th:  Peel the remaining backing paper off of the contact paper and press against the side of the lid.


6th:  Cut a slit in the contact paper from the edge of the paper to the edge of the lid.  Do this to all four corners, then fold over the two sides.


7th:  Cut the contact paper where the folded part meets the table. Do this at all 4 corners. (I used binder clips to help hold down the contact paper as needed.)


 8th:  Fold the contact paper over the side.  Then fold in the corners.
9th:  Cut a slit in the contact paper to make a triangle in the corner. Fold down the larger part.  Then fold the triangle part into the corner of the lid.  Repeat on all four sides.


 10th:  Sometimes contact paper does not hold well on certain surfaces.  Black duct tape did the trick here!


Here are the finished boxes:


But wait!!! As long as I have the duct tape out... let's cover those handles so that I don't get black stuff on my hands when I move the boxes.


Well, that's it for now.  Tomorrow's another day!  :)
HQ