Monday, July 28, 2014

Monday Made It: Library Labels and a BONUS!!

Joining up again with 4th Grade Frolics for a "Monday Made It."


I've been busy this week getting ready for some visitors to my house.  My sister and her family are FINALLY coming to see me!!!  They haven't ever been to this house or Michigan, so I'm thrilled.  But of course that means I also have to have the whole house tidy enough to let her look in every room.  Uh oh!!

Anyway, I've been slogging through my classroom library collection this week, trying to finish labeling each book with the three levels I want to include.  I thought I'd show you how simple it is to make these.

I can't decide if I use this tool more for my crafting or my classroom.  I LOVE my Xyron machine.  It takes paper and turns it into stickers.  Or in my case, labels.  It's so simple to use!

Just stick the paper in on one side and turn the crank. 


Once it's past the edge on the other side, slide the little blade to cut it off. 


Peel the top plastic sheet away. 
(it takes away the extra adhesive from around the edges of your items) 


Easy peasy, ready to use! 

Once my books have stickers, I look up all their levels and write them on the label by hand.  


I've only got about 20 more stacks like this one left to go!  (This is a really long, tedious project!)


In case you're wondering, I just make my labels in MS Word using a table with no borders. Print, cut, roll through the Xyron, and label!

Now for my bonus feature!  :)

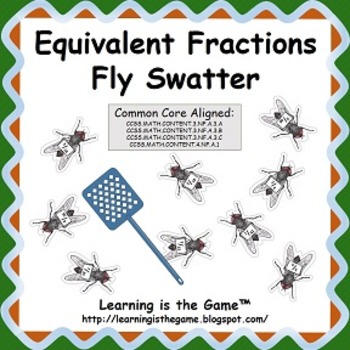
My friend, Dave, from Learning is the Game made this AWESOME activity for me!


It's easy set up -- print, cut, and add velcro to fly swatters.

The kids slap a fly, state the simplified fraction (in the example above, 2/18 would be 1/9) and then flip it over to check.  If they're right, they keep the fly for a point.  


Check out Dave's blog post or his TPT store for more details.

Hope you're having a great Monday!

Friday, July 25, 2014

Fun Friday: Eat Like an Astronaut

My class needed some motivation last year to make sure they had all their work done and behaved well during the week.  After a schedule change in March, we had a 30 minute block at the end of the day on Friday that was too short for a lesson, but too long to not do something productive.  We called it “Finish Up Friday.” Students with everything finished were rewarded with a fun project related to our 5th grade standards.  Click on the tag “Fun Fridays” to see other ideas you might want to try.

 Eat Like an Astronaut

This was one of the favorite "Fun Friday" activities for us.  We have a Space unit in our Science standards and we had a set of stories in our Reading curriculum about astronauts. One of the stories was an interview with an astronaut about what it was like to be in space -- how do they eat, sleep, etc.  I thought it would be fun to experience a little taste of it ourselves!


Of course we had to have the freeze-dried ice cream.  I only got one package and we broke it into little pieces.   Each student got one small piece.


Astronauts ate dried fruit, too, so I brought in a bag of banana chips.  These are so yummy.  If you've never had them, they're worth a try!


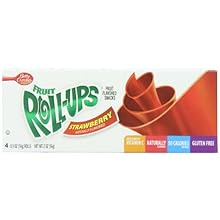
Astronauts could also eat fruit leather. We used the kid-friendly version.  :)


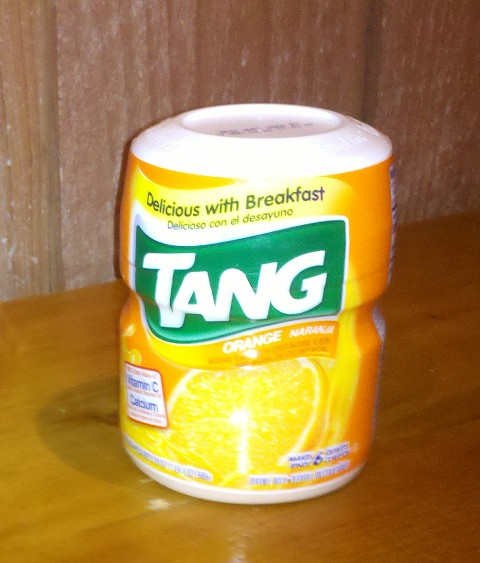
We HAD to drink some Tang!  I couldn't believe they still make this stuff!  I drank so much Tang as a kid.  Apparently it was made popular by John Glen and other astronauts who drank it on their missions.  


Food in space has come a long way since the first manned missions. Our Reading curriculum story talked about how astronauts used to eat meals from a tube, but now they can eat foods packaged in a variety of methods.  I wanted my students to get to try eating a meal from a tube, so baby food aisle it was!  

Each student got a spoon and I squeezed a "taste" of the baby food onto it for them.  I had this Creamy Vegetables with Chicken, one with Red Beans and Rice, and one with Garden Vegetables and Turkey.  They got to choose which one to try.  This was hilarious as the baby food was not terribly appetizing to look at.  

(No one in my classroom ever HAS to eat anything.  It is their choice to try or not try.  We are also very careful about allergies as well.  Please make sure to check any food you serve for potential dangers prior to sharing with students!)


This was a GREAT activity that I will be repeating this year.  So much fun and so motivating for my students to get all their work done!

Got any other great ideas for Astronaut food that's available to the general public? I'd love to hear your ideas in the comments section! 


Wednesday, July 23, 2014

Student Self-Monitoring and Reflection

Part way through the year, I got tired of hearing my 5th graders saying they didn't care about the score they got on an assessment.  They didn't really understand how their assessments added up to a final grade on the report card and they didn't see the "big picture" when they scored well on a single assessment but not well on many others.  

I knew I needed the kids to "buy in" to their own grades.  So I tried several things in my classroom and they seemed to pay off.  I thought I'd share some ideas with you in hopes that these might help in your classroom, too!

1st:  Data Wall:

<-- When students scored 100% on an assessment, they got to put a sticker on our data wall chart.  I wish I'd been doing this all year!  I started to hear kids mumbling about how they "really wanted a blue sticker" when they had gotten a few wrong.  

Each time I passed back an assessment, I called the kids with 100% to the front of the room. While those students were putting stickers on the chart, the rest of the class was recording their scores in their STAR folder (I'll explain those next).

This fall I plan to have a different chart for each subject area.  It was hard to see improvements when everything was lumped together like this. 


2nd:  STAR Folders

 <-- I made a set of folders with this cover for each student.  Each time I handed out assessments, we also quickly handed out these folders to each student.  Inside, students kept records of their assessment scores on a chart with a bar graph.
 Some of the charts had our school's scoring scale on it.  -->

Our school uses a 1.0-3.0 scale with a 3.0 meaning they've mastered the objective.  
<-- We used a separate chart for our weekly spelling tests because they always had 10 words on them.  This way, students could easily see how they were doing over time specifically on their spelling tests.  I wish I had done separate charts for each subject last year.  I will definitely do that this year!  
Want to use these STAR materials in your own classroom?  I just posted this STAR bundle in my TPT store.  You can check it out here, at a discounted price for at least the next 2 weeks! 


3rd: Racing to a Goal


My students take the NWEA 3 times each year.  After their 2nd test, I put up this racetrack to show them the progress they had made (or didn't make!).  My school determines a goal for each student after their fall test.  The winter test provides them with feedback toward their end of the year goal.  Some of my students performed worse in the winter than they did in the fall and didn't seem to care about it.  This racetrack set made a HUGE difference!  In case you can't see the words, they say "START," "Personal GOAL," "College Readiness." Some of my "high" kids had not made any progress toward their goal after 4 months of school.  Some of my "low kids" blew right past their personal goal.  The cars on the track gave us a chance to discuss habits and study skills for everyone, rather than high or low scores.  I loved this!


My students also got a new set of name tags on their desks. Each name tag had a space to write their goal.  We put their end-of-the year goals right on their desks so they could see it every day.  If you're interested, I've got the desk tags for sale at TPT, too.  


So, really long post, but three HUGE ideas for helping students develop self-monitoring skills and motivation.  Hope this helps!  Got any more good ideas for me?  Please share in the comments section! 

Monday, July 21, 2014

Monday Made It: Mini Chart Stand with PVC pipes

A little late in the evening to get this post up, but better late than never, right? :)

Thanks 4th Grade Frolics for the chance to show off my new PVC skills!


So, I saw this on Pinterest and thought it would be perfect for independent stations and anchor charts this year. I thought I'd follow the link and see how hard it would be to make one.  I'm crafty, but not handy.  My husband isn't handy either.  Neither of us has ever worked with PVC before.  I was thinking "I'll never be able to do this...  I bet I don't have the tools and that they cost a lot... I'll probably glue a pipe to my forehead or something..."  

Thanks to Falling Into First for sharing this great idea!  She's got great directions on her site for how to make this.  Of course, once I saw the low cost, easy-to-make chart stand, I started wondering about what other PVC items I could make for my classroom.  Is it going to be worth it to get a lot of PVC or am I just going to make a couple chart stands?

I dare you to type "PVC classroom" into the search engine of Pinterest.  I found some GREAT ideas.  Ok -- I'm willing to take the plunge.  I decided to start with the chart stand and see if it's as easy as they say it is...

Voila! My chart stand!
                                             
After viewing several projects, I saw this tool on someone's directions.  They said it would only cost about $10.  I got mine at Home Depot for $11.98.

(And am I the only one who looks at that picture and sees a bird?)

The tool makes cutting the PVC pipes so easy!  It's just like a scissors with a ratchet feature, so there wasn't much pressure needed to make it cut.  It really is that easy, folks!

Here's the basic process I went through:


Measure carefully
cut with this PVC tool


put the pieces together
Add decorative tape (lengthwise was easiest)


And it's done!


And interchangeable for landscape charts with just one more short pipe covered with tape:


Total cost:
Tool = $11.98
Pipe = $1.38
(and I have enough left to make another)
elbow connectors = $0.50 for two
"adapters" = $0.74 for two
corner "side outlet elbows" = $3.72 for 2

So, now that I own the tool, it will cost me $6.34 for any more chart stands that I make.  (Or less because I'll have leftover pipe.)

I'm not sure it's sturdy enough for me.  I might try a few other methods of making a more stable base.  I'll let you know if I find something better!  It actually took me longer to apply the tape than make the stand.  It's taking me longer to write this post than the entire process of building the project.

Anybody have any good PVC projects they've made?  Any great pins you've found?  Any suggestions for a better base?  I'd love to hear your comments in the space below!


Friday, July 18, 2014

Fun Friday: Corner bookmarks

My class needed some motivation last year to make sure they had all their work done and behaved well during the week.  After a schedule change in March, we had a 30 minute block at the end of the day on Friday that was too short for a lesson, but too long to not do something productive.  We called it “Finish Up Friday.” Students with everything finished were rewarded with a fun project related to our 5th grade standards.  Click on the tag “Fun Fridays” to see other ideas you might want to try.

Corner Bookmarks 


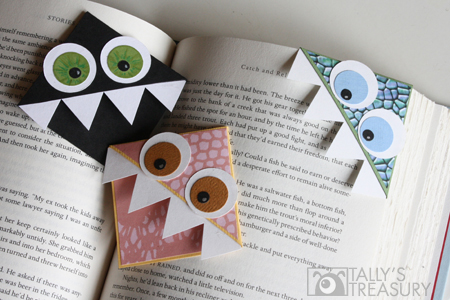
We made some corner bookmarks as gifts to give our Kindergarten Reading Buddies.  My class had so much fun making them!  Students who had finished all their work were allowed to make extra bookmarks for themselves or to give to others as end-of-the-year gifts.  

Check out these links for design ideas:

Best Youtube video for DIY Corner Bookmarks
(watch out for some of the other ones -- I found several with inappropriate language!)

Check out Tally's Treasury for a tutorial on these cute little monsters


Or go to my Pinterest board for Crafts and Indoor Recess ideas:


Tuesday, July 15, 2014

TPT Conference: Blogger Meetup Winner!

OMG!! I won! I won! I won!!

The TPT Blogger Meetup was a great experience!  I cannot begin to imagine the amount of work that went into this HUGE event!!  Look at all the people there!  You could barely move through the room.  Lots of chances to meet other people, swap business cards, share ideas, and get FREE stuff!


First beverage was free.  This is only about half the room!  No matter where you were standing, you were almost always in someone's photo or selfie.


Our amazing hosts from What the Teacher Wants drew names for the door prizes.  I won one!!!


This cute bag was STUFFED full of crayola products!  

Look at all this stuff I won!  There was Model Magic, Markers, window crayons and markers, watercolor pencils, erasable colored pencils, and special construction paper crayons.  I didn't even know that Crayola made some of these things!  Thank you so much to both Crayola for sponsoring and What the Teacher Wants for hosting this!  My students are going to love having these resources this year!


Some of the swag given away for free.  There was lots more, but I didn't want to stand in the really long line.  This was what I grabbed at the end as we left.  Only a small portion of what I saw others got for standing in that long line. It's all good though -- I was 1.5 pounds over the suitcase weight limit at the airport and had to put a bunch of the Crayola stuff in my "bursting at the seams already" carry-on bag so we didn't get charged extra.  

Any great ideas for using the model magic in 5th grade?  I'm going to have to head to Pinterest to get some ideas.  Got any good model magic pins to share?  Post in the comments! 

Monday, July 14, 2014

TPT conference = Awesome!!! Thank you!

The TeachersPayTeachers conference was awesome!  After many hours of sleep and then a very lazy day yesterday, I'm finally feeling like I'm ready to get something done again.  I thought I'd post some of the highlights here with more detail coming in future posts.  I still haven't totally unpacked, I desperately need to run laundry, the milk is past it's expiration date, and there's NO COFFEE!!  Grocery store trip must happen soon.  Gee whiz -- I was only gone 5 days!

First of all, there are some major thank yous I need to share:

Thank you to Kirsten for watching my house and dog while we were away.  You are the best!!

Thank you to TPT for arranging this conference for us!  I'm so glad I went!

Thank you to all the presenters!  I only got to go to 4 sessions, but wished I had been able to attend them all.  Thank you for your generosity in sharing your knowledge and ideas.

Thank you to all the people working behind the scenes to make this event possible.  I'm sure it was a lot of work!  Know that I appreciated your efforts!

Thank you to What the Teacher Wants for the teacher blogger meet up.  That was huge fun!  I absolutely love the swag and the door prize I won!  You made me feel like I was part of something awesome!

Thank you to Crayola for donating the amazing door prize I won!  (see tomorrow's post for that story)

Thank you to the nice guy at the Venetian who helped us get a taxi at 3:30am to the airport.

Thank you to the nice guy in the yellow vest at the airport who helped us get to the RIGHT terminal at 3:45am.

Thank you to my amazing husband who put up with my panic attacks, my eccentricities, my schedule, and even came to the meet up with me and participated in the crazy meet-other-people-at-the-event activity.  He did whatever I needed him to do, whether carry my very girly tote bag up and down the strip or go to the restaurant I wanted or play goofy video slot machines with me.  Love you!!

TPT Blogger Meet up

View up the Vegas Strip

View of the Venetian

TPT Swag

Breakfast before the keynote speakers

Paul Edelman -- the amazing founder of TPT

Deanna Jump -- the most successful TPTer so far

I'll be posting more in the next several days about the conference and the great people I met.  Stay tuned!

PS -- did you post on your blog about the TPT conference?  Please share in the comments!  I'd love to hear about your experience!


Friday, July 11, 2014

Fun Friday: Making Blood

My class needed some motivation last year to make sure they had all their work done and behaved well during  the week.  After a schedule change in March, we had a 30 minute block at the end of the day on Friday that was too short for a lesson, but too long to not do something productive.  We called it “Finish Up Friday.” Students with everything finished were rewarded with a fun project related to our 5th grade standards.  Click on the tag “Fun Fridays” to see other ideas you might want to try. 

Blood Models


Thanks to Jen over at Runde's Room for this awesome Fun Friday activity! I "borrowed" her photo because my hands were a bit messy and couldn't manage to pull out the camera to snap my own pics.  We used cheerios soaked in red food coloring (soak them for a few hours to make them really red) for the blood cells, lemonade (from a powder mixed with water) as the plasma, little white marshmallows as the white blood cells, and candy sprinkles for the platelets.  Lots of fun!  

Duct tape on the lids -- highly recommended at the end!

We studied body systems prior to this activity.  All students watched a video and read a selection about the circulatory system and blood.  Students completed a foldable and a minibook related to these systems.  Only students who had completed all of their work for the week were allowed to make blood.  Some of my students were very disappointed on Friday when they were working on book reports and math homework instead of making their own blood model.  The next week, everyone had everything done by Friday.    

I found this idea through Pinterest.  Check out my other great finds!  Follow me to see the great things I find next! 

Sunday, July 6, 2014

How can it possibly be time for this already??

Back to school deals have started!!  I love back to school deals, but UGH! ALREADY???

It's worth it to run out for these deals, though.

Teachers -- in past years, Office Max has done "double the limit" for teachers.  Plus, with their teacher "Max Rewards" cards, you get points that add up to store credit later.  I'll be running to Office Max tomorrow!

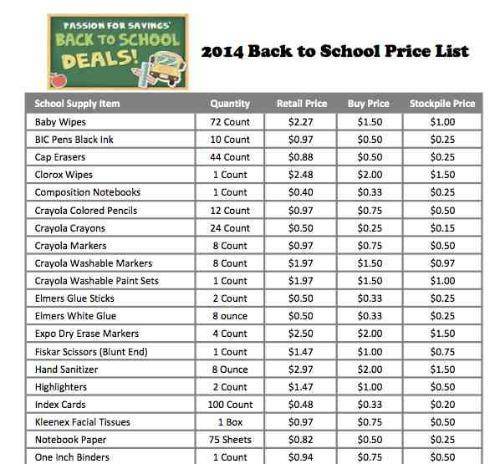
Wondering about whether a school supply sale is really a good deal?  Check out this list at the Passion for Savings page: 


Every year I use this list to decide which stores are worth driving to and which ones are unnecessary.  I LOVE this list! The three prices are awesome.  I know when to wait, when to buy if I know I really need something, and when to buy out the store for something.  :)  I've been known to send politely ask my neighbors, friends, and family to shop at multiple stores and then invite them to make a nice donation to my classroom.  

Happy Shopping!